Digital Foundry | Clair Obscur: Expedition 33 delivers high-end UE5 visuals with solid performance
60fps recommended on PS5, PS5 Pro and Series X - but S is locked to 30fps.

Video | 7 things Bethesda didn't tell you about the Oblivion Remaster
The beard's tale.
.png?width=384&height=216&fit=crop&quality=70&format=jpg&auto=webp)
Feature | Banjo Kazooie sequel chances "better than zero but not much", says composer Grant Kirkhope
Plus his thoughts on Switch 2's Donkey Kong, GoldenEye and the sound of nostalgia.

Review | Skin Deep review
Die Hard: A Space Odyssey.

Opinion | As Days Gone gets its PS5 remaster, it's only right that it gets a critical reevaluation too
Why didn't this game have a sequel, again?
.png?width=384&height=216&fit=crop&quality=70&format=jpg&auto=webp)
DK Rap composer explains why Nintendo didn't credit him in the Super Mario Bros. Movie
"I don't think they ever really liked DK 64 that much."

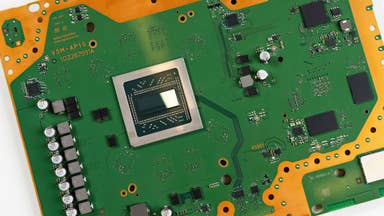
Digital Foundry | Sony's PS5 Pro teardown delivers some wonderfully meticulous design trivia
Louvers, grooves, emissions-suppressing screws, enhanced power delivery lines!

Rusty Lake celebrates ten years of wonderfully eerie puzzlers with a free new game and more
Plus next major release teased.
Rusty Lake celebrates ten years of wonderfully eerie puzzlers with a free new game and more
Plus next major release teased.
Fortnite is being flooded by free Stormtroopers ahead of its Star Wars season
Just connect your Disney account.
Here are your PlayStation Plus games for May
Sony club.
Won't use AI generation itself to make new skins.

Supporters | Five of the Best: Sewers
Wasted.
Digital Foundry | Clair Obscur: Expedition 33 delivers high-end UE5 visuals with solid performance
60fps recommended on PS5, PS5 Pro and Series X - but S is locked to 30fps.
Angry Birds maker and Sega delay Sonic Rumble release once again
Going in for the quill.
Stardew Valley creator promises no more updates until Haunted Chocolatier releases
Knew you were truffle when you walked in.

Digital Foundry | Get this massive 1TB Samsung Micro SD card for just £60
Upgrade your Nintendo Switch, Steam Deck or camera with this high-capacity, high-speed card.
Devil May Cry-inspired Lost Soul Aside delayed
Up the Dante.
Switch users say Virtual Game Cards are a "downgrade" as online game sharing changes
Though still possible offline.
Deals | Game of the Year contender Clair Obscur: Expedition 33 is already £10 off
And it deserves your attention.
Explore our "For you" section and get personalised reading recommendations
-

AMD's high-end Ryzen 9900X processor is £124 off via Amazon US
£335 for a 12-core CPU that debuted last year for £459.
-

Game of the Year contender Clair Obscur: Expedition 33 is already £10 off
And it deserves your attention.
-

This 10,000mAh Anker power bank is just £7 thanks to a potent tick-box voucher
Good for a lot of devices.
-

This popular Thermalright Peerless Assassin 120 SE CPU cooler is a bargain from CCL right now
A cheaper cooler with some excellent performance.
-
-Nintendo-Switch-2-%E2%80%93-Overview-trailer-00-00-32-(1)_HCqcxO1.png?width=285&height=160&fit=crop&quality=70&format=jpg&auto=webp)
A blessing and a cursor.
-

Opinion | Remake Morrowind, not Oblivion, you cowards
Make my Daedra.
-

Opinion | Pokémon games have become consistently ugly, and it's alright to wish they weren't
Honest Feebas.
Subscribe today and gain access to our ad-free browsing experience, supporter-only articles and videos, and much more - for only £2.99/$2.99 a month!
-

Supporters | Five of the Best: Sewers
Wasted.
-

Supporters | Podcast: Inside Nintendo's Parisian Switch 2 reveal event
Natalie Portman didn't get in but we did.
-

Supporters | Five of the Best: Swamps
Bog standard.
-

Supporters | Tom and Ian have played Switch 2 - do you have any questions for them?
Inside Eurogamer recording this week.
-

Review | Skin Deep review
Die Hard: A Space Odyssey.
-

Review | Promise Mascot Agency review
Van life.
-

Review | Clair Obscur: Expedition 33 review
French fancy.
-

Review | Old Skies review
Fia effect.
-

Digital Foundry | AMD's high-end Ryzen 9900X processor is £124 off via Amazon US
£335 for a 12-core CPU that debuted last year for £459.
-

Digital Foundry | Clair Obscur: Expedition 33 delivers high-end UE5 visuals with solid performance
60fps recommended on PS5, PS5 Pro and Series X - but S is locked to 30fps.
-

Digital Foundry | Best gaming CPU 2025: top AMD and Intel processors for your next build
From great budget picks to the fastest flagship options.
-

Digital Foundry | Best PC gaming headset 2025: 12 options from casual to esports-grade
Wired and wireless, cheap to ultra-premium.
-
_XFkvNLu.png?width=285&height=160&fit=crop&quality=70&format=jpg&auto=webp)
Switch users say Virtual Game Cards are a "downgrade" as online game sharing changes
Though still possible offline.
-

Digital Foundry | Best Micro SD Express cards for Nintendo Switch 2
You'll need a new type of card.
-

Oblivion Remastered Luck explained
Plus, how to increase Luck.
-

Oblivion Remastered tips, tricks and guides
Stop right there! Read our guides to avoid (or become) criminal scum in Oblivion.
-

Oblivion Remastered Vilverin puzzle solutions and walkthrough
How to solve the puzzles in Vilverin dungeon.
-

How to get Soul Gems in Oblivion Remastered, and all Soul Gems explained
Expensive magical batteries.
-

Infinity Nikki next Banner, current Banners, and list of all Banners
Upcoming and current Resonance Banners in Infinity Nikki.
-

How to get free items in Infinity Nikki.
-

How to get and craft Cha-Cha Spin in Infinity Nikki
How to get this limited-time pair of shoes.
-

All outfits in Infinity Nikki and how to get them
How to get every outfit set for Nikki.
-

Next Pokemon Go Spotlight Hour for May 2025
Here's April's Spotlight Hour schedule!
-

Abra 100% perfect IV stats, shiny Abra in Pokémon Go
Everything to get the most out of Abra Spotlight Hour!
-

Pokémon Go Max Monday: Next Max Monday Dynamax Pokémon and date listed
Everything you need to know about Max Mondays in Pokémon Go.
-

Shiny Vanillite, evolution chart, 100% perfect IV stats and Vanilluxe’s best moveset in Pokémon Go
Everything to get the most out of April Community Day!
-

PEGI website leak suggests Assassin's Creed Shadows is coming to Nintendo Switch 2
Plus fellow Ubisoft title Star Wars Outlaws is confirmed as coming in September, three months after Switch 2's launch.
-

Digital Foundry | Is Assassin's Creed Shadows with PSSR on PS5 Pro a game changer? We tested it across all display modes
Plus: new improvements to the balanced mode too.
Oblivion Remastered Luck explained
Plus, how to increase Luck.
Oblivion Remastered tips, tricks and guides
Stop right there! Read our guides to avoid (or become) criminal scum in Oblivion.
Oblivion Remastered Vilverin puzzle solutions and walkthrough
How to solve the puzzles in Vilverin dungeon.
How to get Soul Gems in Oblivion Remastered, and all Soul Gems explained
Expensive magical batteries.
All Pokémon TCG Pocket Secret Missions listed
How to complete every Secret Mission in Pokémon Pocket.
Infinity Nikki next Banner, current Banners, and list of all Banners
Upcoming and current Resonance Banners in Infinity Nikki.
Digital Foundry | Best gaming CPU 2025: top AMD and Intel processors for your next build
From great budget picks to the fastest flagship options.
Honkai Star Rail next Banner and current Banner, list of all Banners in Honkai Star Rail
Every current and upcoming character and Light Cone Banner.
Honkai Star Rail Anaxa materials, kit, and Eidolons
Ascension and Trace materials for Anaxa.
Arise Crossover codes for April 2025
How to redeem Arise Crossover codes in Roblox.
Genshin Impact codes for April 2025 and how to redeem them
Primo rewards for Mora fun.
Best mods in Oblivion Remastered and how to install them
Including how to install mods in Oblivion Remastered.


-RTA%E3%82%AC%E3%83%81%E5%8B%A2%E3%81%8CSwitch2%E4%BD%93%E9%A8%93%E4%BC%9A%E3%81%A7%E3%82%BC%E3%83%AB%E3%83%80%E3%81%AE%E3%83%A9%E3%82%B9%E3%83%9C%E3%82%B9%E3%82%92%E6%92%83%E7%A0%B4%E3%81%97%E3%81%A6%E4%B8%96%E7%95%8C%E5%88%9D%E3%81%AEED%E3%82%92%E6%B5%81%E3%81%97%E3%81%A6%E3%81%97%E3%81%BE%E3%81%86...%E3%80%90%E3%82%BC%E3%83%AB%E3%83%80%E3%81%AE%E4%BC%9D%E8%AA%AC%E3%83%96%E3%83%AC%E3%82%B9%E3%82%AA%E3%83%96%E3%82%B6%E3%83%AF%E3%82%A4%E3%83%AB%E3%83%89Switch2-Edition%E3%80%91-00-06-05.png?width=285&height=160&fit=crop&quality=70&format=jpg&auto=webp)


